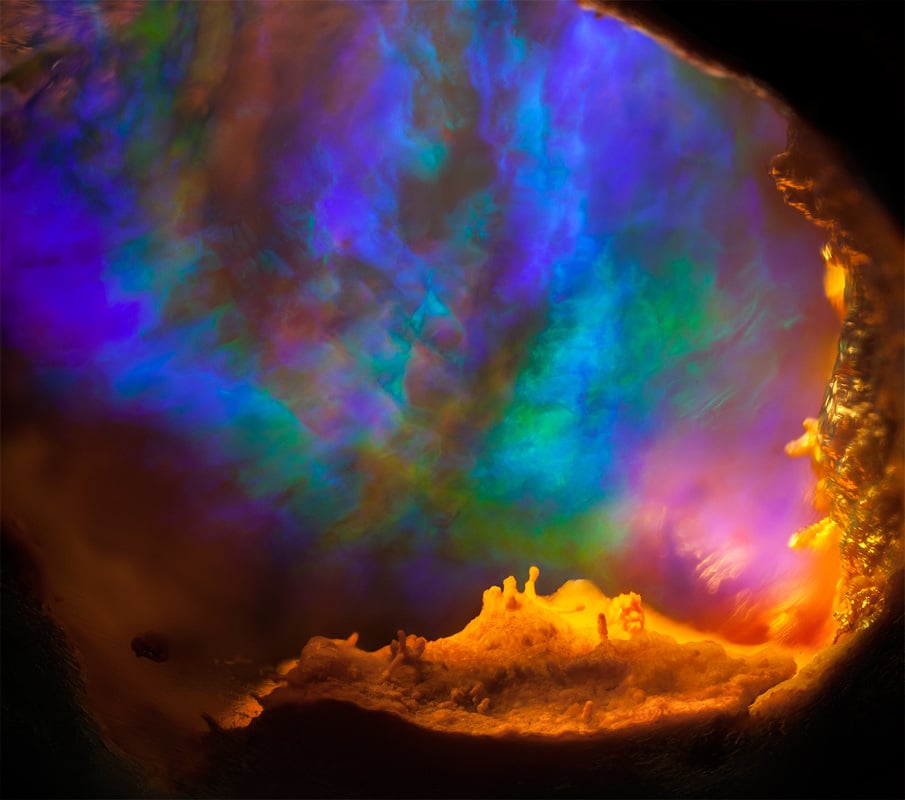
Gemstone Photomicrography: Photographing Inclusions
Explore the amazing world of gemstone photomicrography. These tips can help you view and photograph spectacular inclusions found inside many gems.
3 Minute Read
In the years since I left the GIA, I've taken many photographs. Sometimes, I make mistakes or just fail, but often that's when I learn the most. Now, I want to share the most important lessons I've learned from my experiences.
What is Gemstone Photomicrography?
Photomicrography is essentially photography under magnification. You can do this many ways. Generally, the practice involves a combination of digital photography equipment and computer equipment. I discuss more specifics below. However, I'll cover the actual equipment setup in a future article.
Preparation
You may think your gemstone subject is well-polished. However, once you magnify it, far too frequently you'll find that's not the case. Draglines, pitting, and abrasions all diminish the quality of an image. If you're serious about getting the sharpest shot possible, it starts with the polish. Therefore, either make friends with a competent lapidary or learn how to do it yourself. (I can't do this. Perhaps one day I will). For now, I entrust my pieces to someone who knows the material and can set the foundation for a good photo.
Look
Once you've sharpened up your stone, you get to use those gemological, visual observation skills. Finding the optimal line of sight to the inclusion and then staging the lighting is an exhaustive process. I imagine my stone at the center of a sphere of possible light angles. Not only am I turning the stone on all its axes, I'm also constantly changing the incidental light angles.
Light
In photography, lighting is everything. Gemstone photomicrography is no different. In most of my work, I use no fewer than two light sources. Each has light guides. These allow multiple angles of incidental lighting. They let me quickly and easily change the direction of my light source. Early on in my gemological career, I struggled with the more ubiquitous, rigid, steel wrapped guides. No longer. Now I use the "limp" light guide with a 2 or 3 mm pinpoint attachment. This is one of the most important tools in my work life and gemstone photomicrography life. Investing in one will change the way you use the microscope.
Vibration
Because of the nature of gemstone photomicrography, you'll shoot relatively long exposures. At anywhere from 1/40 and slower, vibrations start showing as blurriness in the image. Everything vibrates. The fans in the light source, the computer on the floor, your music, the camera reflex, the car down the street, etc. Therefore, do whatever you can to minimize vibration. Depending on your budget, you can do this several ways.
First, remove the light source from the microscope table and either dampen or move your computer far away. Next, make sure your scope rests on a very solid, heavy desk or table. The Photoatlas suggests layering a steel plate, dense rubber, and granite between the tabletop and the scope. Granite countertop remnants and used, heavy rubber door mats served me very well before I invested in a laboratory grade vibration isolation table.
Finally, be sure you have software that can remotely control the camera. Manually pressing the shutter release button on the camera is out of the question.
Stacks
With the invention of focus stacking, gemstone photomicrography has gained what it always lacked: depth of field. Depending on your magnification and the depth of field you're covering, you could "shoot a stack" of 10 or 100. If you want to explore this route, experiment with the various image stacking software programs on the market. Keep in mind, you must have a way to change your focus one millimeter or less at a time. Precise, repeatable movements yield the best results. Thus, mechanical stepping is ideal for this. Do a little research to find which stepping mechanism is right for your microscope and budget.
Develop
You can never perfectly clean a gemstone. Even if you could, you might find a tiny little something inside the stone you can't avoid. Photo editing software like Adobe's Photoshop can help touch up your images. Some photographers use Photoshop to bring out colors where there may not have been any. For specific purposes, that's fine. However, I photograph gemstone inclusions to showcase how amazing these stones are on the inside. Therefore, I always try to keep the final image as close to the view through the oculars as possible.
Danny J. Sanchez
Danny J. Sanchez is a Los Angeles-based gemologist and artist. He’s a graduate of the Gemological Institute of America in Carlsbad, California and is self-taught in the art of photomicrography. Initially inspired by the Photo Atlas of Inclusions in Gemstones by Eduard Gübelin and John Koivula, Danny’s images are thoughtfully created, leveraging his gemological knowledge through meticulously tuned photography tools. dannyjsanchez.com
Related Articles
Gemstone Physical Properties
Aquamarine Sources
Shells and Sea Shells
The Role of Sapphire Beyond Jewelry
Latest Articles
800 Years of Mogok: A Celebration in Tenuous Times
What is the Average Gemstone Faceting Yield?
Pyroxmangite Value, Price, and Jewelry Information
How to Identify Emerald Simulants and Synthetics
Never Stop Learning
When you join the IGS community, you get trusted diamond & gemstone information when you need it.
Get Gemology Insights
Get started with the International Gem Society’s free guide to gemstone identification. Join our weekly newsletter & get a free copy of the Gem ID Checklist!
